…last chance to register for the Razzleberry Splash Scrappin' Cards Class! (Remember, this was one of my "must haves" when the new catalog came out? I LOVE this kit!)
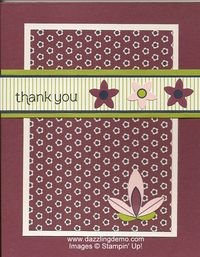
Here's one of the cards  we'll be making in a couple weeks. (Check HERE for details.) The colors in the kit are Rich Razzleberry, Lucky Limeade, Night of Navy, and Pink Pirouette.
They are just so yummy together–and the stickers are just so fun!
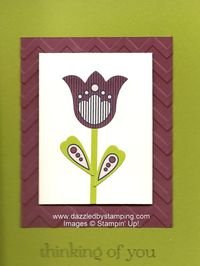
Have you worked with a kit before? The stickers are like cardstock quality! AND whenever I design a kit class, I (you) always end up with a bunch of sticker and designer paper extras.
In fact, while I needed to add the coordinating cardstock, I believe I made another 4 cards with the leftover stickers.
Simple and adorable!
Another great thing about Simply Scrappin' Kits (pg 167-168, full catalog; pg 9, holiday) is HOW MUCH you get in a full kit!
When I design a class, I only use HALF the kit! So if you buy a kit later, you can actually make twice the amount of cards we originally made in the class!
Here are a few tricks for working with the sticker strips specifically….
Rather than just pulling off a whole sticker strip (that now [the leftover section] won't stay on the sheet well):
- If I know the length of strip I need,
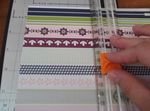
 I use my paper trimmer… lift up the blade and slide it so I'll only be cutting right at the strip I'm interested in. I cut just that strip and lift the blade back up.
 - If I don't know the exact length I need (in this pic, the 4 1/4" width of the card would
 have been obvious and an easy use with the previous trick), I just life the sticker up enough, I can cut the exact length I want…say for a smaller layer on a card.
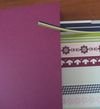
 - Don't forget about the teeny little sticker strips between the decorative sticker strips!! (see pic) Sometimes these
 can make just as cute an accent as the "designer" strips. I learned this trick several years ago from another demonstrator. Otherwise, I probably would have just wasted it.
Don't forget to register for the class TODAY (8/2.) Let me know if you have any questions!
Remember, if you can fall in love with a project, you can learn to create it! Here to help you channel your inner Creative Genius….
Have a great day!
Steph
LIKE me on Facebook and get all my posts delivered automatically to your newsfeed.
Click HERE to subscribe to my FREE weekly newsletter and receive my "5 Tips for Making Fabulous Hand-Stamped Creations." Don't miss out!

Leave a Reply