I had an amazing Hostess Appreciation Party this past Saturday!!!
I'm sorry it's taken me this long to tell you ANYTHING about it!
I'm still cleaning myself out of my little messes!
FIRST, I have to tell you–as if you didn't know already–I have an AMAZING HUSBAND!!!
I think I told you already he took the day off Friday so we could cook for the HAP.
We worked on it all day long. And oh the food was good! As Todd said, "good thing [he] turned into a cook!" Until [8 years ago?] his specials were grilled cheese & soup and hot dogs & mac n cheese. 😉
I seriously could NOT have done this event without him!!
I was bawly off and on most of the day–thankful for him…thankful for all my customers and hostesses…and of course I was lacking sleep.
For those of you desiring the recipe for Irish Potatoes, here it is:
We had great entries for the Annual Card Contest, but I still haven't taken pics of those yet. Don't worry; I'll share!
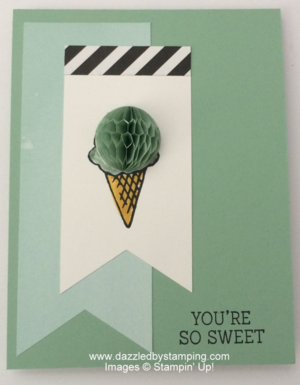
For now, I have to share the cards we made with the SAB items Honeycomb Happiness stamp set and Perfectly Artistic DSP. I designed 3 cards, and everyone made 1 of the designs–depending on where they sat.
Remember you can earn a SAB item with every $50 you spend.
Now if you're like many of my customers, you may be wondering how you'd mail these particular cards….
Good question!!
Let's just say….some things you just need to give in person!
If you'd like to know the technique I showed everyone for mailing, ask someone who was there. I'm sure they'll be happy to tell you! 😉
Ok, I DO have to tell you an easier way to color the chick's belly….
(Remember they come in Mint Macaron, Blushing Bride and White.)
The catalog shows using the Spritzer that we sell.
Sorry but I hate it. Every time I've tried it, I spray sideways.
Coloring your Honeycomb Embellishments
With ALL your honeycombs, very gently open before trying to do anything. It's possible the cardboard backing may rip off if you're not careful enough. Just reattach with Tear & Tape Adhesive or a liquid adhesive and let dry.
- Pour [couple tablespoons?] rubbing alcohol into a little container (like empty mini embellishments) and add a few drops of ink refill.
- Stir if necessary.
- Place honeycomb in container on end with open end down. The color will wick up into the honeycomb within a few seconds–much more easily than trying to open and spray inside.
- Take out of container and let dry overnight on a piece of paper or paper towel–just in case the ink gets on something.
When you USE your honeycomb, open it gently. I like to center the backing on the center of where I'd like it placed. Take the backing off 1 side and press that side onto your project. Then remove the other backing and press that side down.
Viola!
Adorbs!!
Ok, I'll be back tomorrow with more HAP sharing.
Have a great day!!
Remember, if you can fall in love with a project, you can learn to create it! Here to help you channel your inner Creative Genius…
Steph
LIKE me on Facebook.
Follow me on Pinterest.
Subscribe to my FREE newsletter, and receive my "5 Tips for Making Fabulous Hand-Stamped Creations."


Leave a Reply