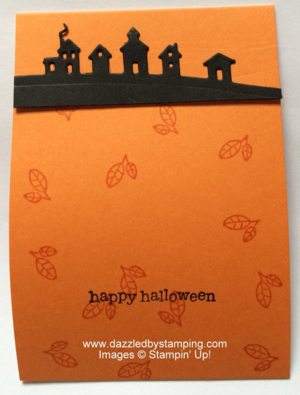
So I'm showing you something that's outside of MY box….
- I typically don't do Halloween; I do "fall".
- I rarely show you anything that I'm planning to use in my clubs/workshops BEFORE I show those attendees.
Well, this one is WAY TOO CUTE not to share right now!!
You know I love/want/need your Stampin' Up! orders.
But I'm also a huge advocate of using what you have to get the job done!
I do it in my business, too–and Halloween is the perfect time to show that.
Here's my take on using what I have for an occasion I don't specifically buy for:
How bout that????
Do you recognize it? The Sleigh Ride Edgelits from the Holiday Catalog, pg 12?
They are available in a bundle with the Jingle All the Way set.
I'm in love with this!
It's a fruit snacks treat packet, and I actually STARTED with the fruit snacks as my inspiration. They determined the size of cardstock I needed.
I literally put them on my Stampin Trimmer to see how large they were and kinda thought through "how large does my packaging need to be to fold up the snack with a little flap?"
Fruit Snacks Packet sizing: 3" x 9 1/2"; scored at 4" and 8 1/4"
- Stamp the large end panel as desired. (I used Cottage Greetings [leaves] and Teeny Tiny Wishes.)
- The edgelit is lined up just above the bottom of the black cardstock; attach to small flap with Tombow Multi-Purpose Adhesive.
- Use a quick strip of Tear & Tape inside the packet to hold the fruit snacks.
- Fold up the stamped packet front and staple shut at the top edge.
- The edgelit decorated flap just loosely covers the edge and staple.
Hope you enjoyed peeking out of my box! 😉
Have a wonderful weekend!!
And don't forget to sign up for my Christmas Stamp Camp!
Friday night class OR Saturday morning class
You have 1 week left to register!!
Remember, if you can fall in love with a project, you can learn to create it! Here to help you channel your inner Creative Genius…
Steph
LIKE me on Facebook.
Follow me on Pinterest.
Subscribe to my FREE newsletter, and receive my "5 Tips for Making Fabulous Hand-Stamped Creations."

Leave a Reply