Thank you so much to those of you who came to my Open House Friday!!
We had lots of fun!
And in case you're wondering, Diane Field won the $25 of FREE product!
Congrats, Diane!!
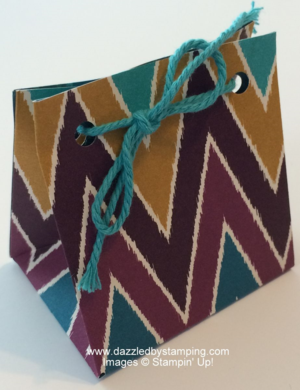
Among the projects we made, were these gift bags–using our new Punch Board:
As to be expected with any of our Punch Boards, there is definitely a learning curve on this board. But the results are SO CUTE!!
Here's the video again for tips on how to use:
To tell you a little bit about the board again…
- You can make a small, medium or large bag–which solely has to do with the WIDTH of the bag (2 7/8", 3 1/8", 3 5/8").
- You can make the bag as short as 2 3/4" tall and as tall as 10 3/4". (The board says 4"-12", which does not take into account the tabs that fold to make the bag bottom.)
- However, the depth (thickness?) of your bag will always be the same (2"), because you use the same triangle of score lines to make the gusset of the [lunch-bag-style] bag.
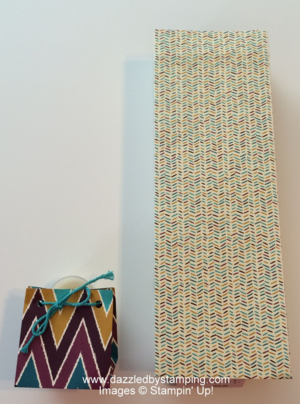
Here's a pic of:
the smallest (S) & shortest bag (starting with 10" x 4" DSP)
next to the largest (L) & tallest bag (starting with 12" x 12" DSP)
The Bohemian DSP was used for all these bags. I LOVE it!!
Before I go, don't forget today starts a new set of Weekly Deals! You can order online anytime!!
Also, you have 1 week left to choose 2 FREE STAMP SETS!!!
You can order the Starter Kit for $99 + tax (NO SHIPPING) without any obligation to hold a class.
Your kit is COMPLETELY customizable! YOU CHOOSE EXACTLY you want for your $125 (yes, not just $99) of product in your kit.
Click here to sign up or call me if you have questions or would like a little input!
Have a fabulous day!!
Remember, if you can fall in love with a project, you can learn to create it! Here to help you channel your inner Creative Genius…
Steph
LIKE me on Facebook.
Follow me on Pinterest.
Subscribe to my FREE newsletter, and receive my "5 Tips for Making Fabulous Hand-Stamped Creations."


Leave a Reply