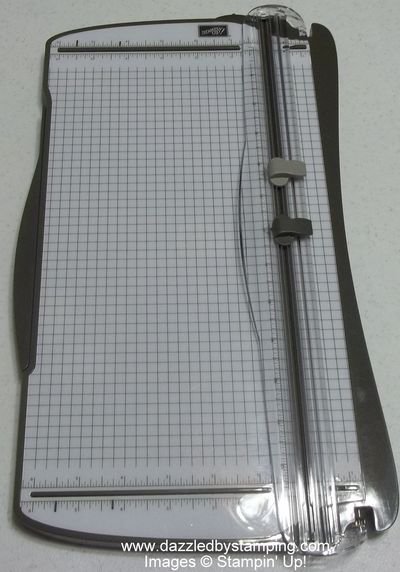
I seriously LOVE the new Stampin' Trimmer!!!!!
If you missed my earlier post, it's available to order now. I was able to preorder mine a couple weeks early. (Demonstrator perks, you know….Ask me how YOU can get those!)
Let me tell you why YOU need the new Stampin' Trimmer, too!
-
 It is LONGER….What that means is there is NO NEED to remove the cutting or scoring blades simply because they're in the way. They are out of the way on either end. (Can you see the 12×12 Glimmer paper with the blades on either end?) So awesome!
 - The base of the Stampin' Trimmer is WIDER, too! (a little over 6" wide) What THAT means is…when cutting and scoring your cardstock for a standard card, you don't have to pull the extender arm out on the side just to cut or score at 5 1/2".
Ok, there are other cool features of the Stampin' Trimmer, but I have to say that just those 2 features themselves make the new trimmer worth my while.
It's honestly amazing how much time it seems to save me when I'm working!! (especially if I'm cutting a slew of cards for a class or something!)
Other features worth mentioning:
- a storage compartment underneath the base (I know some of you have been waiting just for this)
- a slider to lock the cutting/scoring track into position for–storage or travel
- all rulers and measurements on the base printed under a plastic cover so measurements won't wear off
- wider right side grid–with measurements–for cutting thin strips.
Couple more notes:
 Even if you don't have the NEW Stampin' Trimmer, you'll save yourself some time, trouble and eyesight if you mark your most common cutting/scoring lengths (ie: 4 1/4" and 5 1/2") with a Sharpie right on your base or extender arm.
 - The replacement cutting and scoring blades will be available in December. They're not here yet.
If you have more questions about the Stampin' Trimmer, let me know.
I'm enjoying mine! Talk to you tomorrow!
Remember,
if you can fall in love with a project, you can learn to
create it! Here to help you channel your inner Creative
Genius….
Steph
LIKE me on Facebook.
Follow me on Pinterest.
Subscribe to my FREE (bi-)weekly newsletter, and receive my "5 Tips for Making Fabulous Hand-Stamped Creations."

Leave a Reply