Stampin' Up! just added LOTS more items to the CLEARANCE RACK! ← Click here!
- items discounted up to 70%
- lots of framelits/thinlits and embellishments and even some [recently] retired cardstock
- as always, Clearance Rack is "while supplies last"
Are you looking for something you missed before it retired?
Check out the CLEARANCE RACK!
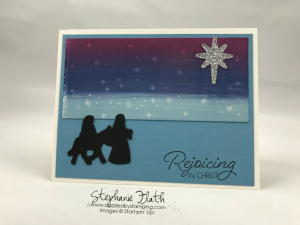
Ok my card for you today is a 2 for 1 deal!
2 techniques–1 amazing background! 😀
Striped Wipe + Emboss Resist (without the emboss) =
We had a fun, messy time playing with this technique at my clubs this month!
YOU NEED:
- Glossy Cardstock
- VersaMark
- baby wipes
- Classic ink refills
- something sturdy–and bigger than your glossy cardstock piece–to do the "swiping". (We used Dynamic Embossing Folders.)
1) Stamp your [stars] on Glossy cs FIRST and LET THEM DRY! (10 minutes?) **This allows the stars to RESIST the ink you're gonna swipe across it.
2) Drape a baby wipe over the edge of your "something sturdy" (our folded edge of our embossing folder) and stand it upright so baby wipe is at the top.
3) Drip Classic Ink refill colors across that edge, making sure they to wick together. (We used 3 different colors; I did 3 or 4 drops of one color in a row, then continued with the last 2 colors in the same way. So I had 3 blocks of colors in a continuous row across the baby wipe/top edge of my folder.)
4) Lay Glossy cs on scrap paper; HOLD THE BABY WIPE SO IT'S TAUT, and swipe the inked edge across it from one end to the other. Continue until you have the coverage you desire.
• you can go back and forth to get good coverage
• MAKE SURE you keep the same colors in the same order
• wipe can last for 2 or 3 pieces of Glossy; if the color runs low, add more ink
5) LET DRY before attaching to your project. The color WILL fade.
Here's all the product we used:
Have a happy Monday!


Leave a Reply