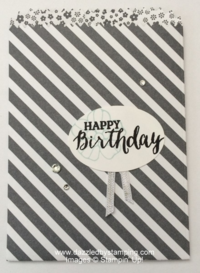
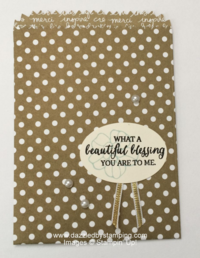
I'm guessing we've all had those moments.
You have a plan.
You've thought it all out.
And it fails.
Here's MY recent story…some of you were witnesses.
And I think God may have put me in your lives to test your patience. 😉
So I have these Mini Treat Bag Thinlits that make adorable projects!
I finally pulled them out and decided to try them out on a couple of my clubs.
The treat bag is made up of 2 different panels (2 separate thinlits) that you end up adhering for the complete bag.
We were using designer paper. That mattered.
If you turned the panel sideways, it wouldn't line up the way it should…words sideways, etc.
The first night didn't go too badly. There were a couple mishaps, but 2 people did all the "big shotting" for everyone and did a pretty good job!
Cute bags!
Then I stuck my nose in.
For my next club, I thought I'd be helpful and do the 2nd panel for everyone, so they didn't have to and it would save them time………. 😀
I warned them to just make sure they had the "teeth" of the bag (like a brown paper bag) at the top.
THEY did great!!
I, on the other hand, not so much….
FIRST, there were a couple that I didn't follow my OWN advice and had the teeth at the bottom.
Remember those words on the designer paper?
Yah. They were upside down.
THEN it hadn't occurred to me–AFTER everyone was having a problem–that if they ran their panel through the Big Shot with a different side/design of paper UP than me, the tab (to adhere the 2 pieces together?) would be on the wrong side.
OH.MY.WORD.
BEYOND frustrating!!
A couple people just accepted their fate and either said it looked fine or just tried to make me feel better. (Poor Marilyn just thought it was all her fault!)
I salvaged a couple more with some extra pieces I had available.
And shockingly, some turned out just like they were supposed to!!!
No sales of the Mini Treat Bag Thinlits, though! Ha!
Go figure.
Ok, so they really are adorable!!!
But here are my tips–if you have them or even buy them after my amazing story:
- There are 2 ways you can mess up–flipping and turning….
- Unless you use totally PLAIN color cardstock or paper, you need to run both panels through the Big Shot in one sitting–or pay very, very close attention to the direction of the thinlit and the side of the DSP you have showing when you run it through. (You'll need a 6×6 and 3×6 piece of DSP.)
- If you DO use designer paper, you'll have much less stress if it's one that doesn't exactly matter if it matches up exactly (like random flowers or polka dots.)
- Don't work on this project if you're short on time or stressed–or like to enjoy wine and have already had a couple glasses. 😀
For those of you who were witnesses, I WAS also able to salvage the messed up ones left behind. 😀
Hoping the next good intention goes as planned! 😉
Have a fantastic day!
By the way, I'm ordering new catalogs today! Yay!!!
Remember, if you can fall in love with a project, you can learn to create it! Here to help you channel your inner Creative Genius…
Steph
LIKE me on Facebook.
Follow me on Pinterest.
Subscribe to my FREE newsletter, and receive my "5 Tips for Making Fabulous Hand-Stamped Creations."


I think you should have shown the pictures of the messed up ones…too funny Steph! But hey, we've all been there, done that, so thank you for my morning chuckle!! :0)
Haha! See the thing is, I never even thought of sharing until I had conquered my failure!! And except for the ones taken home/put up with by others, I just had a pile of pieces. :/ But you're welcome for the chuckle! 😉