Dalia Marin won the $50 in FREE Stampin Up! products!!!
Many of my customers know many of my customers….
But I doubt any of you know Dalia; however, she's become just like you.
I met her at church on my trip to Washington DC, and she has become a faithful friend and customer just like all of you!
Congratulations, Dalia!!
And thank you again–ALL OF YOU–for a wonderful Sale-a-Bration and for your patience and loyalty you always show me!!
Ok, I had my Occasions Stamp-a-Stack last night, and like usual we had a wonderful time!!
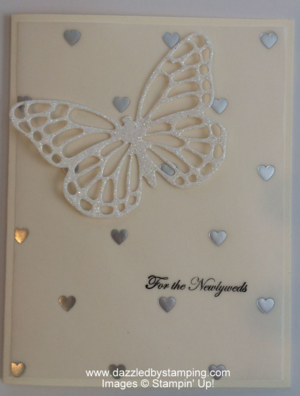
I have to show you my favorite card I came up with!!
The picture never does it justice. You'll have to see it in person!
By the way, I didn't have to have these Butterfly Thinlits UNTIL I COULDN'T have them! 😉 Isn't that always the way??
Card base is Very Vanilla with Silver Fancy Foil Vellum and Dazzling Diamonds Glimmer Paper.
Couple tips:
- Thinlits: Use a thicker shim to help cut through the cardstock/glimmer paper better; I used a fold card between the bottom cutting mat and the platform.
- Thinlits: Cut side UP does seem to cut better….sandwich from bottom up = platform > shim > cutting mat #1 > thinlit/cut side up > wax paper> glimmer paper/glimmer side down > cutting mat #2
- Vellum: It's non-porous; use Black Staz-On for your ink AND LET IT DRY completely before messing with it again.
- Vellum: Adhesive shows through it; we used Mini Glue Dots behind the hearts to adhere the vellum to the card base.
Ok, gotta go.
Tyler is graduating from GRCC tonight (and actually wants to walk.) 🙂
He'll be starting GVSU in the fall.
Have an amazing day and a fantastic weekend!
Remember, if you can fall in love with a project, you can learn to create it! Here to help you channel your inner Creative Genius…
Steph
LIKE me on Facebook.
Follow me on Pinterest.
Subscribe to my FREE newsletter, and receive my "5 Tips for Making Fabulous Hand-Stamped Creations."

Leave a Reply