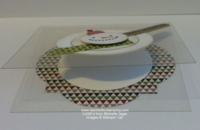
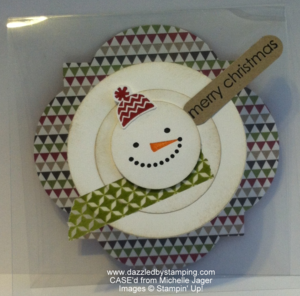
I have always loved cards like my customer, Michelle Jager, made for our last club swap.
So I CASE'd it!!!!
(you know….Copy And Share–or Steal–Everything!)
The card base is made from a Window Sheet.
So cool.
I used Snow Day for this cute little guy…
Embellished Events & the Word Window punch for the greeting…
Season of Style Washi Tape for the scarf! (love that)…
and Window Frames Framelits & Season of Style DSP for the background.
TIP #1:
 I liked how Michelle used extra layers to cover up the adhesive showing through on the other side.
With that in mind, there are (3) 2 1/2" circles, a 1 3/4" circle and 1 1/4" circle popped with a Dimensional.
TIP #2:
The Window Frame DSP is attached to the outside back of the card base with adhesive only where the inside circle covers.
TIP #3:
All layers of the snowman itself are sponged just a little with Crumb Cake ink (coordinates with my choice of DSP) just to give it a little dimension and visual separation of layers.
TIP #4:
Window Sheets come in a pack of (2) 12×12 sheets…
You can get (4) 4×4 cards from one sheet if you:
- First cut off 4" of the sheet and set aside.
- Then cut the remaining 8×12 sheet into (3) 4×8 cards.
- Cut the final 4×12 down to 4×8.
- Score all (4) 4×8 sheets in half at 4".
Have fun making your own Window Sheet cards!
One last thing before I go….
I set the date for my 12th Annual Hostess Appreciation Party–
SATURDAY, FEBRUARY 15
If you haven't qualified to attend (within the last year–hostess, club member, book party, or hostess order of $150 or more), you have the rest of the month to place a qualifying order or host/close a book party. Ask me for details!! 🙂
Hope you're all staying warm inside.
Be safe if you have to head out on the snowy roads!
Remember, if you can fall in love with a project, you can learn to create it! Here to help you channel your inner Creative Genius…
Steph
LIKE me on Facebook.
Follow me on Pinterest.
Subscribe to my FREE newsletter, and receive my "5 Tips for Making Fabulous Hand-Stamped Creations."

Leave a Reply