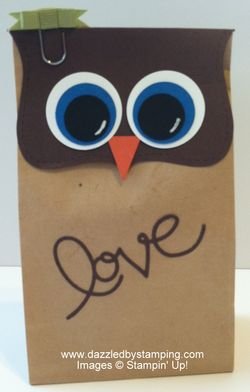
I love this chick!!
I made her for my hostess Abby last week and thought I'd share with you, too….
Owls still seem to be really popular, and you can find a lot of them on Pinterest.
I had to add a couple of my own touches.
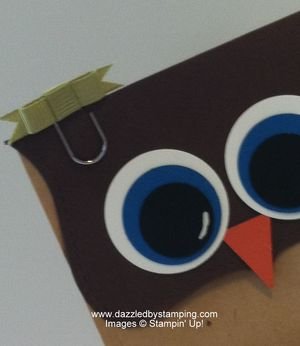
First is always THE EYES for me.
Using a little white gel pen to draw "some light" in the eyes makes her come alive.
Reminds me of Disney eyes–like Bambi and Thumper. (LOVE THEM, by the way!)
Second is her BOW!! Isn't she cute?!?!
It's an Old Olive Simply Styled Embellishment from the Holiday Catalog (pg 22.)
It comes that way–bow attached to clip (12 in a pkg) and it's actually holding my bag closed.
Third–I didn't want to decorate the bag too much, but I DID want to use my Expressions Thinlits dies.
Love the font on these!
They [the end result] are very delicate–probably not even 1/8" wide lines.
So I have a couple tips/tricks for you:
- Put a layer of wax paper between your thinlit and cardstock for easier removal.
- Keep a toothpick with the set….There are holes in the thinlit to help punch out the word from the die. Paper piercing tool is TOO sharp.
Here's a list of everything I used. You may even have most of it all already!
But if NOT, click HERE to order:
- small bags (mine are 3 1/2" wide from Michaels)
- Top Note Die/Big Shot
- Expressions Thinlits Dies
- 1 1/4", 1" and 3/4" Circle punches
- Petite Pennants Builder punch
- white gel pen
- Old Olive Simply Styled Embellishments
- 2-Way Glue pen (to attach "love")
- SNAIL Adhesive
- Chocolate Chip, Whisper White, Pacific Point, Basic Black, Tangerine Tango cardstock.
Hope your first week back to school was great!
Enjoy the next one, too!! 😉
Remember,
if you can fall in love with a project, you can learn to
create it! Here to help you channel your inner Creative
Genius….
Steph
LIKE me on Facebook.
Follow me on Pinterest.
Subscribe to my FREE newsletter, and receive my "5 Tips for Making Fabulous Hand-Stamped Creations."


Very cute! I'm always looking for cute "owl" ideas as my mom has been collecting owl's for years and years and years…. :0)
More ideas are good! Glad you liked it, Marcia!