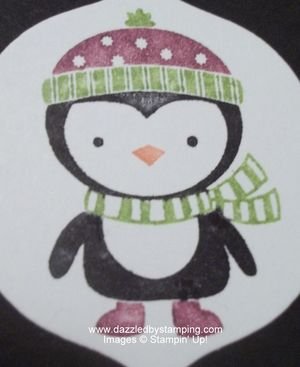
That's the name of the Stampin' Up! set this little guy is from. No Peeking (click here for images) is pg 23, full catalog.
He's so stinkin' cute! Can you even stand it?!
There's something about pictures of penguins that I just love. In fact, all the images in this set are so cute.
And look how perfectly he fits into the smallest Framelit from the Apothecary Accents! (By the way, he can fit in it "straight on", but I wanted to use the Framelit differently. And the black is from the Labels Collection.)

Oh! And then there's my Rich Razzleberry! How can you go wrong?!
(I'll have to make another one in my non-favorite colors, though, just to show you I
love the little guy–whether or not he dresses to my taste.)
This is my favorite Christmas card I've made so far this year!
I love how all the polka-dots coordinate, too!!….his hat…the Polka Dot Parade DSP…the Lucky Limeade Designer Printed Brads (these come as a pkg of all the 2011-2013 In Colors.)
Even the wreath in "Jolly" looks polka-dot-y! (new word.)
I'd love to do this card at my Christmas Stamp Camp, but I think everyone would get a little frustrated with the direct-to-stamp coloring. It's rather time-consuming, but the results are SO WORTH IT–occasionally. *Ü*
(Gotta figure out how to use him, though!)
Have you ever done direct-to-stamp coloring? Here are some things to help you succeed if you've never done it.
- You need markers, a stamp, cardstock and hot air (your breath.)
- Color directly onto the stamp image itself as desired.
- I always start with the lighter colors first, so I don't pick up a dark color with my light marker.
- You can use either the brush tip or fine tip.
- I usually use the brush tip to make the process quicker.
- Once all your coloring is done–and before you stamp the image!–breath onto the stamp like you would to clean your glasses or steam a mirror.
- Don't blow like when whistling; you'll dry it out.
- The object is to re-wet the stamp.
- Stamp the image onto your cardstock immediately.
- If you need to stamp the same image again, you need to repeat the whole process.
If you've never done it, give it a try!
By the way, I told you yesterday that I was going to show you another Wonderful Winterland card tomorrow. Sorry I changed my mind! I'm saving them for next week.
However, tomorrow will still be Pinterest-inspired. (See you tomorrow!)
Remember,
if you can fall in love with a project, you can learn to
create it! Here to help you channel your inner Creative
Genius….
Have a great day!
Steph
LIKE me on Facebook.
Follow me on Pinterest.
Subscribe to my FREE weekly newsletter, and receive my "5 Tips for Making Fabulous Hand-Stamped Creations."

Cute, cute card! Another stamp set I just passed over and now I'm wondering why?!!! 🙂
Thanks, Marcia! Actually, I passed over the set, too, until someone asked me a question about it.