It's the final episode of my mini-series.
I'm still perfecting this tip as well, but it's a must see for a girl like me.
Q: Do you ever end up with splotchy results with your bold stamps?
A: YES!!!!!!!!!
Solution: Condition your stamps.
You know I'm a lazy stamper. I want quick and convenient.
So I've never really conditioned my stamps.
I've always just played with twisting my stamps on my ink pad.
Well……that really doesn't work well with our new firm foam pads.
So here's how you CONDITION your bold stamps:
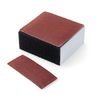
 When you first get your stamps, use your sanding block (or a fine grade of sand paper) to gently rough up the rubber/surface of your stamp.
Obviously, you don't want to "scrub" too deeply and change the stamp image.
But roughing it up (conditioning it) helps it accept ink more easily.
We struggled a bit using the Christmas Star on World Card-Making Day.
This would have helped a lot.
I hope you enjoyed my mini-series.
 Here's a sneak peek for Monday.
I'll be back with more on the Christmas Star….
Have a great weekend!
(One week until my Christmas Stamp Camp! Can't wait!!)
Remember,
if you can fall in love with a project, you can learn to
create it! Here to help you channel your inner Creative
Genius…
Steph
LIKE me on Facebook.
Follow me on Pinterest.
Subscribe to my FREE newsletter, and receive my "5 Tips for Making Fabulous Hand-Stamped Creations."
Leave a Reply