How 'bout that for some inspiration?!
I love the colors, of course! But there's so much more that makes you dreamy.
I didn't have any beach-type-stamps that would go with this pin on one of my Pinterest boards.
So I went with the overall tone of the picture….Simple card, gorgeous colors, fun technique….
The colors are Gumball Green, Baja Breeze, Pool Party, Tempting Turquoise and Pacific Point.
The technique is one of the Baby Wipes Techniques.
What you need:
- your choice of Classic (water-based) ink refills
- White Glossy Cardstock
- baby wipes
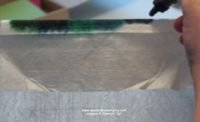
- a firm straight edge that's larger than the piece of cs you want to "color" but small enough to handle with one hand. [First pic I had a different set of colors and was using my Big Shot cutting mats…kinda too big; second pic was one of my Embossing Folders…perfect for what I needed; credit card size is great for a smaller background.]
What you do:
- Fold the baby wipe in half and fold over the edge of the [straight edge].
- Starting at one end, squeeze a couple drops (# depends on your desired color width) of ink refill on the baby wipe-covered-edge so they bleed enough to overlap.
- Continue with the next color–again overlapping so it's a continuous "rainbow".
- Repeat with all your ink refills to make the rainbow a little longer than your glossy cs.
- With the uncovered edge of the straight edge in the crook of your hand–while holding onto [hopefully both] edges of the baby wipe–run the colored edge of the baby wipe [at an angle] across your glossy cs……..Repeat until the desired brightness of color is achieved. (I tried to do a pic of this last step, but camera or computer was being funny…..You run this across like you would a putty knife for spackle or a spatula when spreading frosting. Got it?)
- Let dry completely and stamp this cool background as desired.
The sentiment is from Daring Adventure, pg 104.
Hope you enjoyed! Have a great weekend!
Remember,
if you can fall in love with a project, you can learn to
create it! Here to help you channel your inner Creative
Genius….
Steph
LIKE me on Facebook.
Follow me on Pinterest.
Subscribe to my FREE (bi-)weekly newsletter, and receive my "5 Tips for Making Fabulous Hand-Stamped Creations."


Love the colors!
Thanks Steph for the inspiration!
You're welcome, Mary Kay! Glad you liked it. See you soon!
I'd forgotten about this technique…very cool card!
I know, Marcia….It's so easy to forget about those fun techniques! This one can be stunning–partly because you do it on glossy cs.